Wednesday, July 2, 2014

ODI 12c SCD Type 2 Step by Step Implementation

ODI 12c SCD Type 2 is very easy compare to ODI 11G.

Please find the below steps for SCD Type 2 implementation.

I have created new target table to support SCD behaviour.

CREATE TABLE DEV.SCD
  (
    EMPLOYEE_ID           NUMBER(6,0),
    FIRST_NAME             VARCHAR2(20 BYTE),
    LAST_NAME              VARCHAR2(25 BYTE) NOT NULL ENABLE,
    EMAIL                         VARCHAR2(25 BYTE) NOT NULL ENABLE,
    PHONE_NUMBER     VARCHAR2(20 BYTE),
    HIRE_DATE                DATE NOT NULL ENABLE,
    JOB_ID                       VARCHAR2(10 BYTE) NOT NULL ENABLE,
    SALARY                     NUMBER(8,2),
    COMMISSION_PCT NUMBER(2,2),
    MANAGER_ID           NUMBER(6,0),
    DEPARTMENT_ID     NUMBER(4,0),
    STATUS_FLAG          VARCHAR2(1 BYTE),
    STARTING_DATE      DATE,
    ENDING_DATE          DATE
  )  TABLESPACE SYSTEM ;


Step1:
------
Import IKM Oracle Slowly Changing Dimension  Knowledge module.


Step2:
--------
Open Target SCD table and Change the SCD Behavior.


I have select SCD Behavior like below options.


Step3:
-------
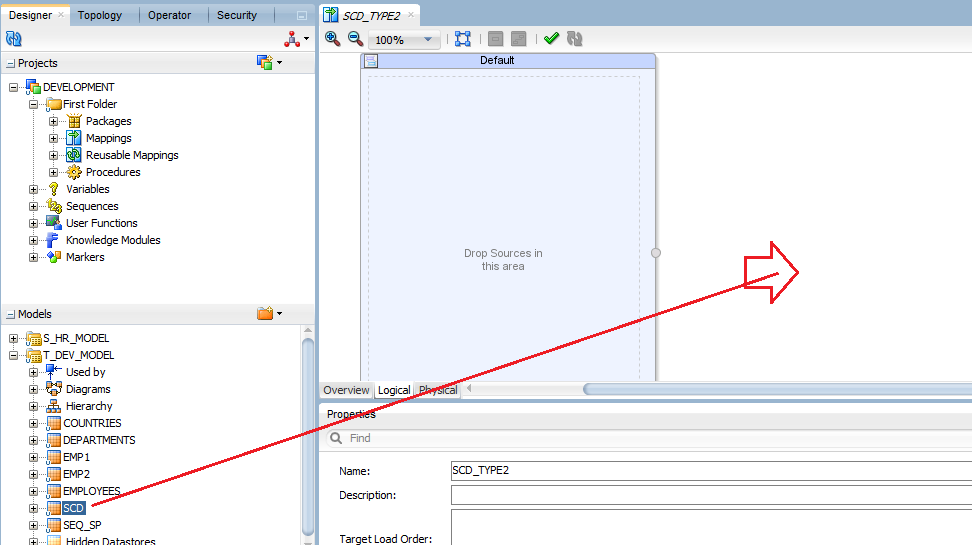
Creating Mapping for Loading the data from Source table (hr.employees) table to
target table (dev.scd).



These three columns we are not receiving from Source , we need to map at direct target table


I have done mapping STATUS_FLAG=1 ( Default Active-1, Inactive-0),
STARTING_DATE=SYSDATE ,
ENDING_DATE = SYSDATE( But it will take default value from IKM SCD as 01-01-2400.


Selecting LKM SQL to SQL Knowledge module in Physical Tab


Selecting IKM Oracle Slowly Changing Dimension Knowledge Module 


Selecting CKM SQL knowledge module for Data Quality validation at I$table.


Running Interface using Run button in Top Menu


Target table is empty as of now there is not records in target SCD table.


Program executed successfully. We can see the status as Green  .


110 records are inserted as STATUS_FLAG=1 as New Records or active records.


UPDATE hr.employees SET salary=77777 WHERE employee_id=100;

COMMIT;

I have update data in source table and again i am running my mapping.


Program finished successfully.


One record got inserted as salary got changed it will Add row on change behavior


We can see the modified record inserted as new records and old record updated STATUS_FLAG=0
inactive record.  STATUS-FLAG=1 is active for new records.


Oracle 12C new featureTemporal Virtual Columns start date and end date for Dimension tables


Oracle 12C new featureTemporal  Virtual Columns start date and end date for Dimension tables
    Valid time temporal support is typically used with Oracle Flashback technology, to perform AS OF and VERSIONS BETWEEN queries that specify the valid time period. You can also use the DBMS_FLASHBACK_ARCHIVE.enable_at_valid_time procedure to specify a option for the visibility of table data: all table data (the default), valid data as of a specified time, or currently valid data within the valid time period at the session level.

    Some scenarios where valid time temporal support can be useful include:
    • Information Lifecycle Management (ILM) and any other application where it is important to know when certain data became valid (from the application's perspective) and when it became invalid (if it ever did)
    • Data correction where incorrect data needs to be retained and marked with the period when it was considered valid, and where the correct data needs to be visible as currently valid

Example:
------------
Creating one dim table 

CREATE TABLE hr.emp_dim AS
SELECT employee_id, first_name, salary FROM hr.employees;

Adding Valid_time into new dim table:

ALTER TABLE emp_dim ADD period FOR valid_time;

if you see desc emp_dim
we can see only three columns employee_id,first_name,salary
we can't see  valid_time_start and valid_time_end hidden columns.

If we want to see the hidden columns we need to include in SQL select query.

select first_name,
to_char(valid_time_start,'dd-mon-yyyy') "Start",
to_char(valid_time_end,'dd-mon-yyyy') "End"
from hr.emp_dim;


We can insert start date and end date values using below queries.

UPDATE emp_dim
SET valid_time_start = to_date('01-JUN-1995','dd-MON-yyyy'),
  valid_time_end     = to_date('15-SEP-2010','dd-MON-yyyy')
WHERE first_name    IN ('Lex','Alexander','Bruce','David','Daniel');

UPDATE emp_dim
SET valid_time_start = to_date('01-AUG-1999','dd-MON-yyyy'),
  valid_time_end     = to_date('01-MAR-2012','dd-MON-yyyy')
WHERE first_name    IN ('Steven','Diana');

UPDATE emp_dim
SET valid_time_start = to_date('20-MAY-1998','dd-MON-yyyy')
WHERE first_name    IN ('Neena','Nancy','Valli');


COMMIT;


Tuesday, July 1, 2014

OBIEE 11.1.1.7 Step By Step Installations on Windows7


OBIEE 11.1.1.7 Step By Step Installations on Windows 7

Step2: IP Address Config.


System Configuration:
Harddisk: 40GB
RAM :  6GB or 8GM
Database:  Oracle 11G R2 (11.2.1)
JDK  :   jdk 1.6

 Setting IP address for your local system. Other once you restart after installations your OBIEE services
wont work because IP address will get changed.

Goto=>C:\Windows\System32\drivers\etc

edit =>  hosts  file.


OR


How to install a Loopback Adapter in Windows 7

 http://www.windowsreference.com/windows-7/how-to-install-a-loopback-adapter-in-windows-7/


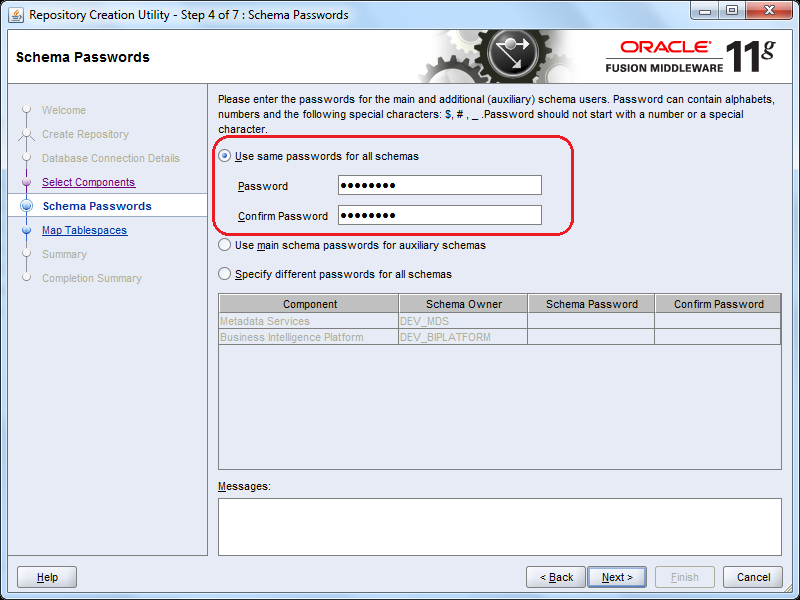
Step2: RCU Creation 11g(11.1.1.7)


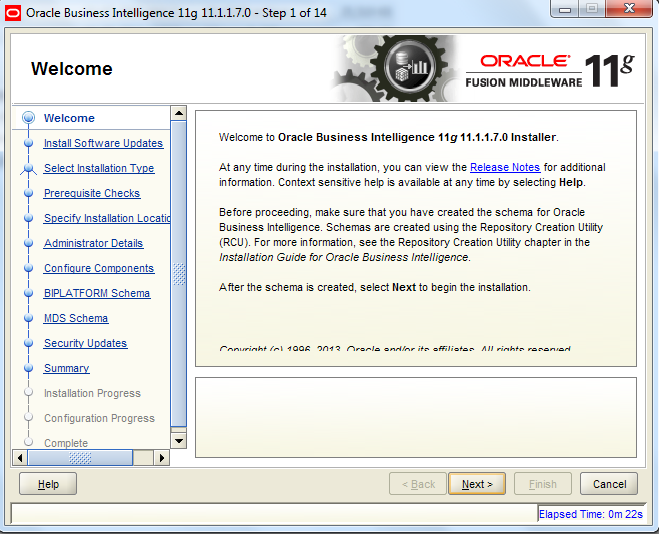
Step3: OBIEE Installations.


Select Type of installation


Providing New weblogic server credentials for first time installations.

Username:   weblogic
Password:  welcome
Domain:  bifoundation_domain


Provide path where you want to install middle ware home with OBIEE home.


Provide RCU db information where we are created in db.
Host:  localhost
dbPortno :  1522
SID:   ORCL
Schema username:  DEV_BIPLATFORM
schema password:   welcome


Oracle Database 12c New Features for Developers

Oracle Database 12c New Features for Developers

Session level sequences
A new SESSION level database sequence can be created now in 12c to support the session level sequence values. These types of sequences are most useful and suitable on global temporary tables that have session level existence.

Session level sequences produce a unique range of values that are limited within the session, not across the sessions. Once the session ends, the state of the session sequences also goes away. The following example explains creating a session level sequence:
Examples:
SQL> CREATE SEQUENCE my_seq START WITH 1 INCREMENT BY 1 SESSION;

SQL> ALTER SEQUENCE my_seq GLOBAL|SESSION;

While Creating Table we can use Sequence as Default Value
With Oracle Database 12c, we can directly assign sequence nextval as a default value for a column, So you no longer need to create a trigger to populate the column with the next value of sequence, you just need to declare it with table definition.

Example:
create sequence product_seqno start with 1 increment by 1 nocycle;

create table product_dim
(
   product_id number default product_seqno.nextval,
  product_name     varchar2(30),
  qty                      number,
  status                  varchar2(1),
  cre_date             date,
);


Table Level Invisible column:
Oracle Database 12c provides you the Invisible column feature. A Column defined as invisible, will not appear in generic queries (select * from). An Invisible Column need to be explicitly referred to in the SQL statement or condition. Also invisible column must be explicitly referred in INSERT statement to insert the database into invisible columns.

Example:
SQL> create table emp
   (
   emp id number,
    ename varchar2(100),
    email varchar2(100),
    sal number,    
    comm number INVISIBLE,
    deptno number
    );
  
SQL> ALTER TABLE my_table MODIFY (password visible);  


Multiple indexes on the same column
Before Oracle Database 12c, we could not have multiple indexes on a single column. In Oracle Database 12c a column may have multiple indexes but all should be of different types. Like a column may have B-Tree and BitMap Index both. But, only one index will be used at a given time.


VARCHAR2 length up to 32767  (Not Verified in 12.1.0 version)
Form Oracle Database 12c, a varchar2 column can be sized upto 32767, which was earlier 4000. The maximum size of the VARCHAR2, NVARCHAR2, and RAW data types has been increased from 4,000 to 32,767 bytes.


Analytical  Functions same as MYSQL  Top-N feature
A Top-N query is used to retrieve the top or bottom N rows from an ordered set. Combining two Top-N queries gives you the ability to page through an ordered set
Example:
SQL> SELECT sal
    FROM   emp
    ORDER BY sal DESC
    FETCH FIRST 10 ROWS ONLY;


Sequence Values generating using  IDENTITY Columns
In Oracle Database 12c, We can define Table columns with SQL keyword IDENTITY which is a American National Standards Institute (ANSI) SQL keyword. Which are auto-incremented at the time of insertion (like in MySQL).
Example:
SQL> create table EMP
    (
    empid number generated as identity,
    ename varchar2(100),
    email varchar2(100),
    sal  number,
    comm number,
   deptno number  
    );


PLSQL Function with  WITH Clause improvement
In Oracle 12c, we can declare PL/SQL functions in the WITH Clause of a select statement and use it as an ordinary function. Using this construct results in better performance as compared with schema-level functions
Example:
SQL> WITH
     FUNCTION emp_f(n IN NUMBER) RETURN NUMBER IS
     BEGIN
        RETURN n+1;
      END;
    SELECT  EMP_F(1)
    FROM   dual ;


Cascade for TRUNCATE and EXCHANGE partition.

With Oracle Database 12c, The TRUNCATE can be executed with CASCADE option which will also delete the child records.
Example:
SQL>  TRUNCATE TABLE EMP  CASCADE;

Move table partition to different Tablespace online

From Oracle 12c, it become very easy to move Table Partition to different tablespace and does not require complex steps
Example:
  SQL> ALTER TABLE MY_LARGE_TABLE MOVE PARTITION MY_LARGE_TABLE_PART1 TO TABLESPACE USERS_NEW;


Temporary Undo
Before Oracle Database 12c, undo records of temporary tables used to be stored in undo tablespace. With the temporary undo feature in Oracle Database 12c, the undo records of temporary tables can now be stored in a temporary table instead of stored in undo tablespace. The main benefits of temporary undo are 1) Low undo tablespace usages 2) less redo data generation. For using this feature Compatibility parameter must be set to 12.0.0 or higher and TEMP_UNDO_ENABLED initialization parameter must be Enabled.


DDL logging
By using the ENABLE_DDL_LOGGING initiation parameter in Oracle Database 12c, we can now log the DDL action into xml and log files to capture when the drop or create command was executed and by whom under the $ORACLE_BASE/diag/rdbms/DBNAME/log|ddl location. The parameter can be set at the database or session levels.
Example:
  SQL> ALTER SYSTEM SET ENABLE_DDL_LOGGING=TRUE;


ODI 12c J2EE Agent & Standalone Colacated Agent Configuration

J2EE Agent will work  After mapping with WLST credentials  Both SUPERVISER & weblogic
User names and password.


Please find the below steps for Creating Domain for ODI Console, J2ee Agent & Standalone Colacated Agent Configuration.

Step1:  Agent Creation in TOPOLOGY

Agent name:  OracleDIAgent  ( Case sensitive)
Portno:  7001  ( Weblogic server portno)

Step2:  Domain Creation for J2ee Agent, Odi Console and Colocated Agent.


After finishing domain creation start weblogic server  using startWeblogic.batch file in windows
startWebLogic.sh  file for unix or linux.


You can see the weblogic service status as RUNNING.


Open below url for weblogic server console.

http://localhost:7001/console

Credentials should same as at the time of Domain creation we provided username and password.

username:  weblogic
Password:  Admin123


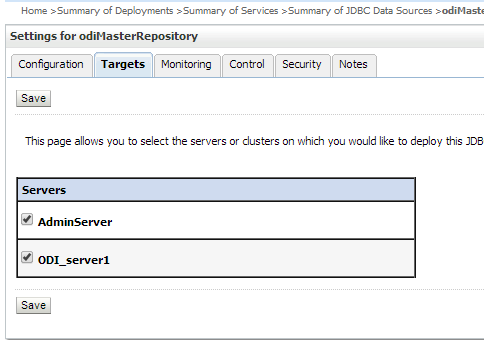
Goto=>Home >Summary of Services >Summary of JDBC Data Sources

Click on Master repository=>Goto=>Target Tab=>Select Admin Server
click Save


Click on Master repository=>Goto=>Target Tab=>Select Admin Server
click Save
Same as Work repository we need to add Admin server
Click on Work repository=>Goto=>Target Tab=>Select Admin Server
click Save.


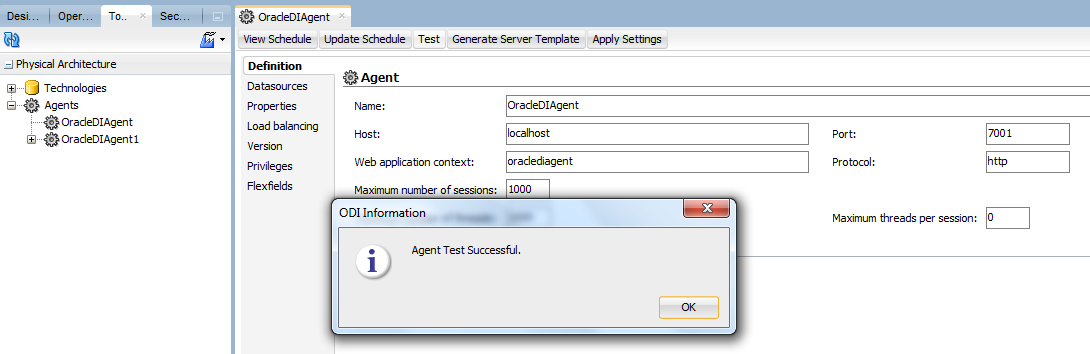
Restart services and Goto=>Topology=>Agents=>OracleDIAgent
Click on Test agent.

Difference between ODI 11G and 12c new features


12C We can below listed Features.

1) Mappings we can use more than one target table (in 11g one Interface only one target table)
2) Reusable mappings added 
3) Reusable mappings available in Global Objects.
4) Procedure GUI changes compare to 11G.  Here we can create options directly.
in 11G We have to Right click on Procedure and then we can create options in 11G.
5) In mappings we can specify options directly Creating Source Data sources DBLinks.
6) Standalone colocated agent is working on WLS template.
7) Hive Technology Added for Hadoop.
8) Wallet ( to store security credentials same as OWB).9) In-Session Parallelism10) Step-by-Step Debugger11) Oracle Warehouse Builder Integration12) Unique Repository IDs